
Delish Strawberry Shortcake Bars Recipe
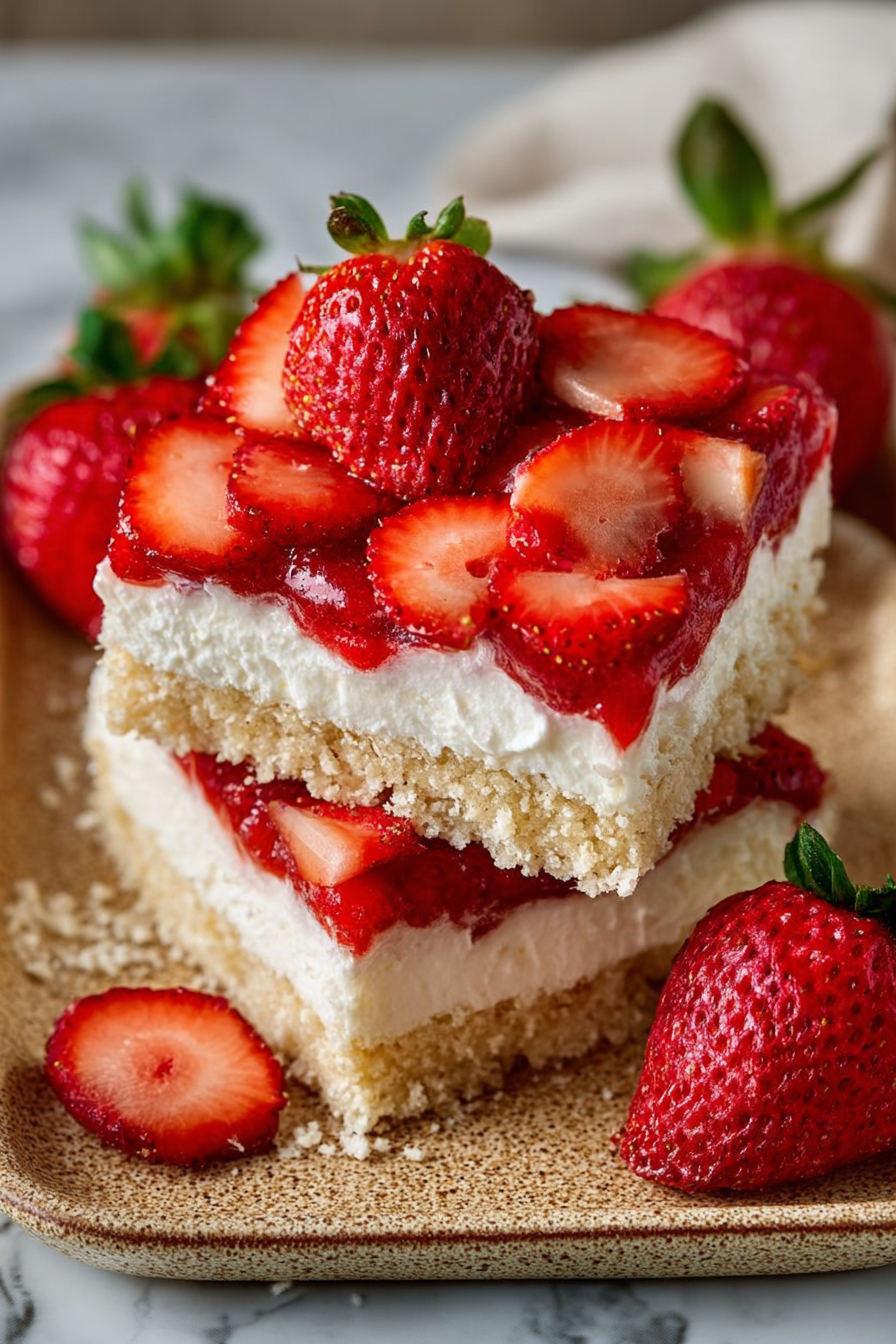
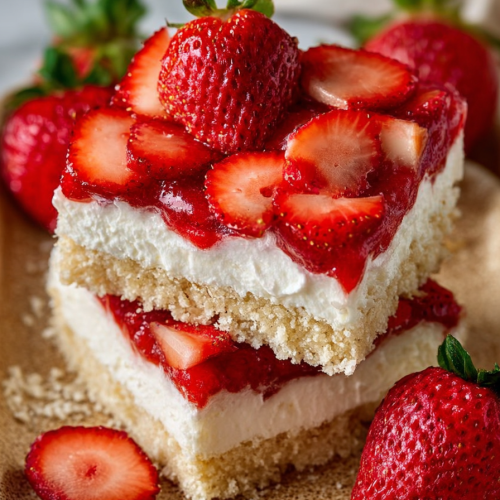
This is my shortcut-for-summer version of classic strawberry shortcake—baked into tidy bars that are easy to slice, transport, and serve to a crowd. Think a crisp, buttery shortbread base, a glossy layer of macerated strawberries, and a pillowy whipped-cream topping that keeps the flavors bright and simple. It’s the same nostalgic profile as the dessert you grew up on, but faster to make and less fussy when you need a sweet that travels well.
My husband is the unofficial official taste-tester in our house, and he’ll happily eat these for breakfast if I let him. Our kids fight over the corners, and I’ve learned to bake an extra pan for school events because these disappear faster than I expect. I first made these on a rainy spring afternoon when the strawberries were impossibly fragrant—now they’re a weeknight treat and my go-to showstopper for potlucks.
Why You’ll Love This Delish Strawberry Shortcake Bars Recipe
– Hands-down, the easiest way to get shortcake flavor without fussing with individual biscuits or layered cakes—slice-and-serve convenience for gatherings.
– The bar format lets the strawberry juices soak just enough to be luscious without turning the base mushy when you follow a few simple chilling tips.
– It’s flexible: swap the topping, add a crunch layer, or use different summer berries and it still sings.
– Perfect for make-ahead entertaining—you can prep components in stages and finish right before guests arrive.
Behind the Recipe
I landed on this bar format after many experiments trying to balance a tender shortbread-like base with juicy fruit and a creamy finish. The trick is to keep the base sturdy enough to hold the berries but tender when you bite into it. A quick blind bake for the crust, a short maceration for the strawberries so they release flavor but not too much liquid, and a lightly sweetened whipped topping are the little moves that make the difference. Home cooks often over-macerate the berries or try to assemble everything warm—both lead to soggier bars—so patience with cooling and timing pays off. Also, using cold butter for the crust and pulsing it rather than overworking the dough gives you that pleasant crumb without turning tough.
These strawberry shortcake bars are a fun twist on a classic—super easy to make, and the homemade strawberry topping really shines. I wish the recipe included more detailed instructions for the cake layer, but overall, it’s a crowd-pleaser that’s perfect for summer picnics.
Shopping Tips
– Produce/Fruit: Choose ripe but firm strawberries—bright color and a sweet aroma mean better flavor and less watery juice when macerating.
– Baking Basics (Flour/Sugar/Leaveners): All-purpose flour works best for a shortbread-style base; measure by spooning into the cup or use a scale for reliable texture.
– Dairy: Pick a good-quality heavy cream for whipping—higher fat yields fluffier, more stable whipped topping.
– Eggs: Use room-temperature eggs if the recipe calls for them; they incorporate more evenly and help the crumb set properly.
– Fats & Oils: Unsalted butter is ideal so you control the salt; if you must use salted, reduce any added salt slightly.
– Nuts & Seeds: Toasted slivered almonds or chopped pistachios are optional but worthwhile for a crunchy finish—buy pre-sliced if you want to save time.
Prep Ahead Ideas
– Slice and macerate the strawberries up to 24 hours ahead; store them in a covered container and drain any excess liquid before assembling.
– Bake the crust a day in advance and keep it wrapped at room temperature; add fruit and topping just before serving.
– Measure dry ingredients and soften butter for the crust the night before—bring butter to the right temperature just before mixing.
– Store whipped cream in a chilled bowl and cover; re-whip briefly if it loses volume before serving.
Time-Saving Tricks
– Pulse the crust ingredients in a food processor to get a uniform crumb and faster assembly.
– If strawberries aren’t peak, use thawed frozen strawberries drained well—toss with a bit of cornstarch to control excess juice.
– Keep a small hand mixer or immersion blender on hand for quick whipped cream; freeze the beaters for extra speed and volume.
– Do your mise en place: have pans, parchment, and measuring spoons out so you can move through baking steps without stopping.
Common Mistakes
– Over-macerating the berries: I learned this the hard way—let them soften just enough to release aroma, but don’t sit in syrup for hours or the crust will go soggy. Drain briefly if they look too wet.
– Underbaking the crust: It should be golden at the edges and set in the center—too pale and it will be crumbly when cut.
– Overwhipping the cream: Stop when soft peaks form; overbeaten cream turns grainy and separates. If that happens, a tiny splash of unwhipped cream and a gentle whisk can sometimes bring it back.
– Rushing assembly while components are warm: Let the crust cool before adding fruit so the topping keeps its texture.
What to Serve It With
A pot of strong coffee or a bright iced tea complements the buttery base; for a fancier pairing, serve with a scoop of vanilla bean ice cream or a drizzle of balsamic glaze for a grown-up contrast.
Tips & Mistakes
Keep the components separate until just before serving if you need the bars to travel—that prevents sogginess. If you want a more stabilized topping for warmer weather, fold a few tablespoons of mascarpone or powdered sugar into the whipped cream.
Storage Tips
Store in airtight containers in the fridge. It reheats beautifully, but if you sneak a bite cold straight from the container, it still works.
Variations and Substitutions
– For a lemony lift, add a little zest to the crumb or a thin lemon glaze over the strawberries.
– Swap half the strawberries for raspberries or blueberries for mixed-berry bars—be mindful of berry juiciness.
– To make these gluten-free, try a blend of almond flour plus a gluten-free flour mix, but expect a slightly different texture; press the crust firmly and chill well before baking.
– If dairy-free, use a coconut cream whipped topping and a plant-based butter substitute designed for baking—results will be a touch softer but still delicious.
– Want crunch? Add a sprinkle of chopped toasted nuts between the fruit and cream.
Write me the frequently asked questions and answers Delish Strawberry Shortcake Bars Recipe in the same way as the example below.
Frequently Asked Questions
Delish Strawberry Shortcake Bars Recipe
Ingredients
Main Ingredients
- 1.5 cups all-purpose flour sifted
- 0.5 cups granulated sugar plus extra for topping
- 0.5 cups unsalted butter melted
- 0.5 cups heavy cream
- 2 cups fresh strawberries sliced
Instructions
Preparation Steps
- Preheat your oven to 350°F (175°C). Grease and line an 8x8 inch baking dish with parchment paper.
- In a mixing bowl, combine flour, sugar, and melted butter. Mix until crumbly.
- Press the mixture into the bottom of the prepared baking dish and bake for 15 minutes.
- While the crust bakes, whip heavy cream in a large bowl until soft peaks form.
- Remove the crust from the oven and cool slightly. Layer the sliced strawberries over the crust, then spread the whipped cream on top.
- Chill in the refrigerator for at least 2 hours before slicing into bars.
Notes
Featured Comments
“Impressed! Clear steps and turned out amazing results. Perfect for busy nights.”
“New favorite here — will make again. sweet treat was spot on.”
“This creamy recipe was turned out amazing — the rich really stands out. Thanks!”
“Impressed! Clear steps and absolutely loved results. Perfect for busy nights.”
“New favorite here — absolutely loved. crowd-pleaser was spot on.”
“Impressed! Clear steps and absolutely loved results. Perfect for busy nights.”
“This sweet treat recipe was turned out amazing — the crowd-pleaser really stands out. Thanks!”
“Impressed! Clear steps and will make again results. Perfect for busy nights.”
“Super easy and will make again! My family asked for seconds. Saving this one.”
“This sweet treat recipe was turned out amazing — the rich really stands out. Thanks!”