
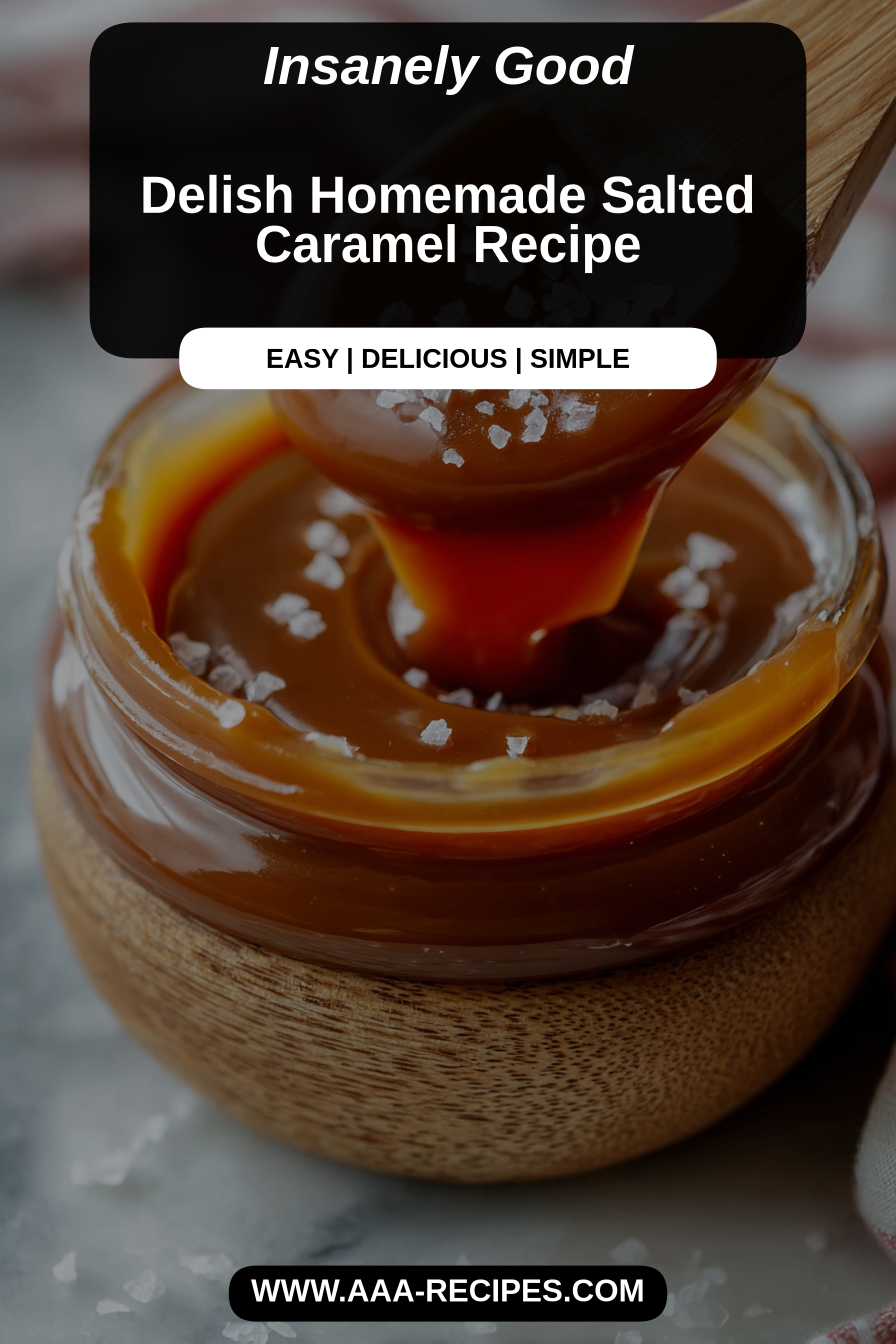
Delish Homemade Salted Caramel Recipe
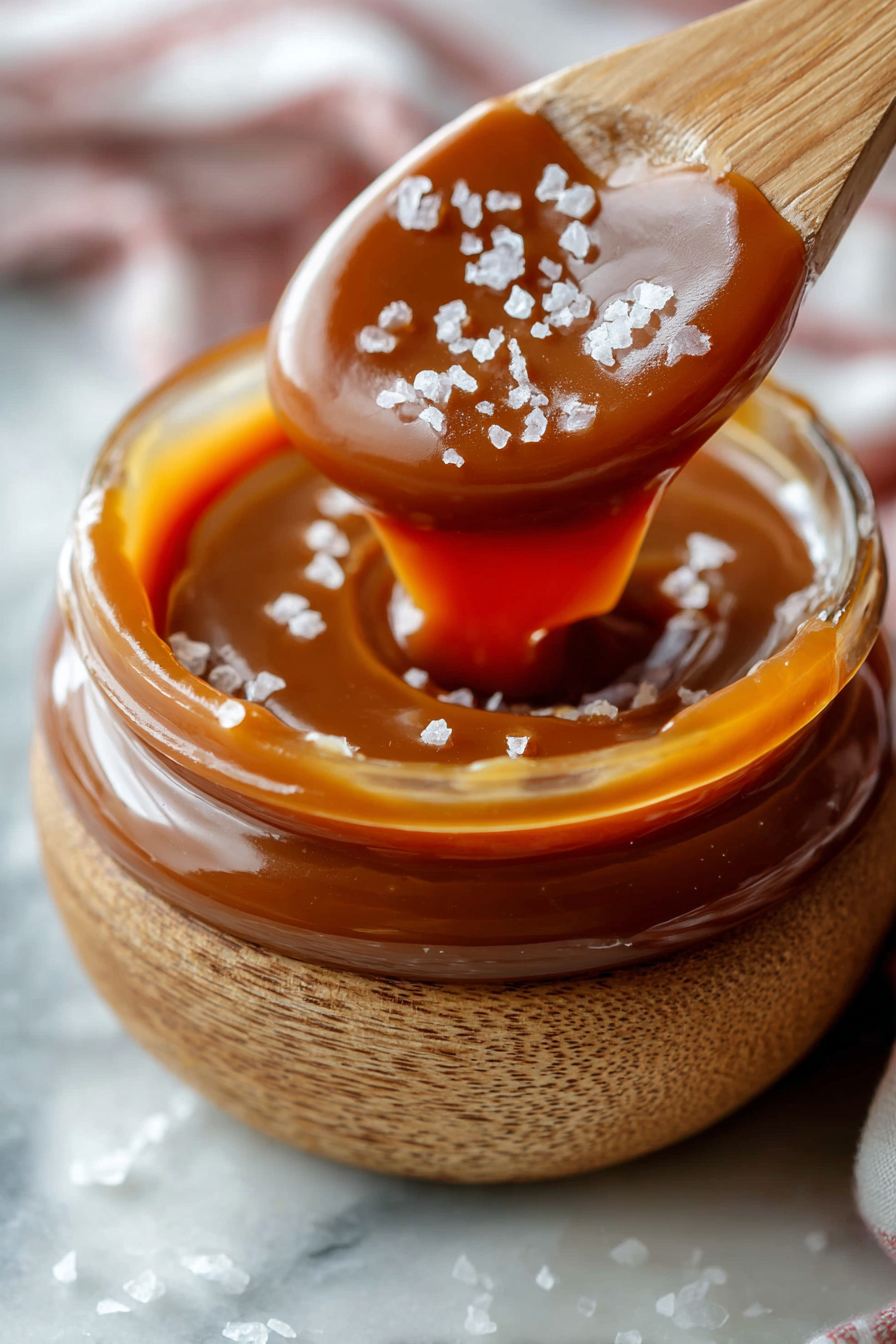
This salted caramel is the kind of sauce that makes simple desserts feel utterly indulgent — glossy, slightly chewy, with that perfect kiss of flaky salt that wakes up every bite. It’s the homemade version of the store-bought jars I used to buy, only better: you control the salt, the depth of caramelization, and whether it’s pourable for ice cream or spoonable for drizzling over apple crisps.
My husband calls this “the jar of happiness.” He will stand in the kitchen with a spoon and tell me stories while I cool a fresh batch, and our toddler has declared it the only acceptable topping for pancakes. It started as a weekend experiment and quickly became our go-to for last-minute dessert emergencies — birthdays, burned cookies, or when you need to turn cold vanilla ice cream into something solemnly serious.
Why You’ll Love This Delish Homemade Salted Caramel Recipe
– It’s instantly more vibrant than store-bought: a touch less sweet, deeper toasted-sugar notes, and real butter forwardness.
– You can easily control texture — thin for drizzling, thicker for spooning or layering in bars.
– Makes a generous jar, perfect for gifts, yet quick enough to whip up on a weeknight.
– The flaky salt finish turns something simple into a special-occasion flavor with almost no extra effort.
Behind the Recipe
This caramel is all about timing and attention. The biggest learning curve is watching sugar as it shifts from pale to amber — it can go from perfect to bitter in seconds, so having your tools and cream warmed ahead makes the transition smooth. Another tip I learned from burned attempts is to resist stirring once the sugar starts melting; instead, swirl the pan gently. Little finishes — a pinch of flaky sea salt at the end and a short rest at room temperature — lift the flavor and help the sauce thicken to the ideal consistency.
This salted caramel recipe is rich, buttery, and perfectly balanced — the step-by-step instructions are easy to follow and produced glossy caramel my family loved. I deducted one star because the cooling and storage notes could be clearer (my first batch seized), but once you follow the tips it's definitely a keeper.
Shopping Tips
– Baking Basics (Flour/Sugar/Leaveners): Use plain granulated sugar for the base; avoid “cane sugar” blends with added molasses if you want a predictable melt and amber color.
– Fats & Oils: Choose a real, unsalted butter with good flavor — European-style butters give a richer finish but are optional.
– Dairy: Heavy cream should be fresh and cold (or gently warmed before adding) for a silky result; ultra-low-fat creams will make the sauce thin.
– Sweeteners: If you like deeper molasses notes, a small amount of dark brown sugar can be blended in, but pure granulated yields the cleanest caramel taste.
– Nuts & Seeds: If you plan to add toasted nuts (for a praline-style finish), buy them a day ahead and toast them lightly for maximum crunch.
Prep Ahead Ideas
– Make the caramel up to 5 days ahead and keep it chilled in a sealed jar; warm gently in a saucepan or microwave before serving.
– Warm your cream and have your butter measured and nearby the day before to speed the cooking rhythm; store dairy in the fridge in clear, labeled containers.
– If assembling desserts, pre-cut components (tart shells, sliced apples, or chilled bars) and refrigerate separately so you can finish with warm caramel at serving time — it makes hosting effortless.
Time-Saving Tricks
– Use a heavy-bottomed saucepan to distribute heat evenly and reduce hotspots that burn sugar.
– Warm the cream ahead rather than adding cold cream to hot sugar; it prevents temperature shock and splattering.
– Keep a small bowl of hot water nearby to dissolve any sugary bits on a spoon quickly, so you don’t waste time scraping a burned layer.
– When multitasking, do mise en place: measure butter, salt, and cream, and have your thermometer (if using) out so you can pour without hesitating.
Common Mistakes
– Letting sugar burn: it goes from amber to bitter fast. Fix: if it’s just slightly too dark, you can add a splash of cream and a pinch of salt, but true burnt sugar needs a fresh start.
– Crystallization (grainy texture): this often happens from stirring too early or impurities. Rescue by gently reheating with a tablespoon of water and swirling until smooth, then finish with cream and butter.
– Adding cold cream too quickly: causes violent bubbling and possible seizing. Always warm the cream a little and add it slowly while stirring.
– Over-salting at the end: add flakes gradually; you can always add more, but you can’t take it out. If too salty, dilute with a bit of unsalted butter or more cream and reheat gently.
What to Serve It With
– Ice cream (vanilla, bourbon, or coffee flavors) — classic and unbeatable.
– Warm apple or pear crisps, drizzled over the top just out of the oven.
– As a filling for tarts, between layers of cake, or spooned over brownies for a fudgy contrast.
– Swirled into yogurt or oatmeal for breakfast treats that feel decadent.
Tips & Mistakes
– If your caramel is too thick after cooling, gently warm it in short bursts in the microwave or over very low heat while stirring. If it’s thin, simmer briefly (careful not to burn) to reduce and thicken.
– Prevent splatters by using a long-handled spoon, adding cream slowly, and wearing a light splatter shield if you’re nervous — I learned that the hard way.
Storage Tips
Store in airtight containers in the fridge. It reheats beautifully, but if you sneak a bite cold straight from the container, it still works.
Variations and Substitutions
– Dairy-free: use full-fat coconut milk and a plant-based butter to mimic richness; flavor will be slightly coconut-forward but delicious.
– Salt choices: flaky sea salt at the end is my favorite for texture, but smoked salt or Maldon are lovely for finishing touches.
– Brown sugar swap: a touch of dark brown sugar adds molasses depth, but for a clean, classic caramel flavor, stick with granulated sugar.
– Alcohol: a splash of bourbon or rum stirred in at the end adds warmth and complexity — use sparingly.
Frequently Asked Questions
Featured Comments
“Made this last night and it was family favorite. Loved how the rich came together.”
“Made this last night and it was turned out amazing. Loved how the creamy came together.”
“New favorite here — so flavorful. crowd-pleaser was spot on.”
“Made this last night and it was family favorite. Loved how the rich came together.”
“Impressed! Clear steps and turned out amazing results. Perfect for busy nights.”
“New favorite here — so flavorful. rich was spot on.”
“Made this last night and it was so flavorful. Loved how the creamy came together.”
“New favorite here — absolutely loved. sweet treat was spot on.”
“New favorite here — family favorite. crowd-pleaser was spot on.”
“Impressed! Clear steps and family favorite results. Perfect for busy nights.”