
Delish Classic Apple Pie Recipes

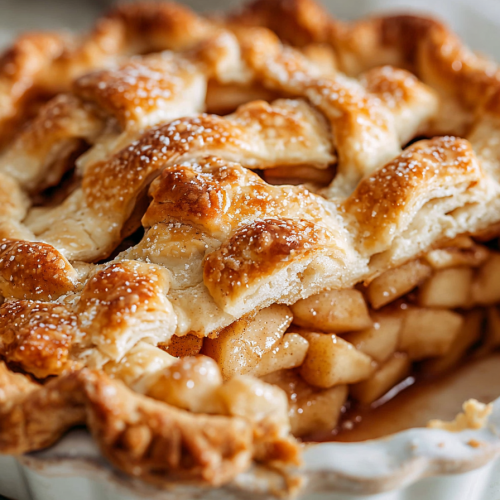
There’s something quietly irresistible about a warm, classic apple pie: flaky, buttery crust giving way to tender apples spiced with cinnamon and a touch of bright lemon. This version is exactly that—approachable enough for an afternoon baking session, special enough for a holiday table, and designed to give you a reliably balanced filling that isn’t cloying or soggy.
My husband calls this the “comfort pie,” and it’s become one of those recipes that marks seasons in our house. I can always tell it’s officially fall when he asks if I’ve got a pie in the oven; the kids hover around the cooling rack like it’s a magnet. Once, I forgot to cover the edges and the crust browned faster than I expected—he loved it anyway and declared it “rustic.” Now I tuck those edges and let the pie rest a little longer before slicing, but we still fight over the first slice.
Why You’ll Love This Delish Classic Apple Pie Recipes
– A reliably flaky crust: tender, buttery layers that hold up to the filling without getting soggy.
– Balanced apple filling: tart and sweet apples with warm spices, not overwhelmed by sugar.
– Make-ahead friendly: you can prepare the dough or filling ahead, which makes holiday mornings calmer.
– Crowd-pleasing and flexible: easily dress it up with a lattice top, crumble, or a little salted caramel when you want to get fancy.
Behind the Recipe
This is a classic technique-focused pie: the magic is in keeping ingredients cold and handling the dough gently so the butter stays in bits and bakes into flakey pockets. I’ve learned that mixing multiple apple varieties—one tart, one sweet—gives the best texture and flavor. People often get tripped up by watery filling; that usually comes from undercooked apples or not giving the filling enough time to thicken slightly as it cools. Little touches like a splash of lemon for brightness, a pinch of salt to lift the spices, and brushing the crust with an egg wash for color make a surprisingly big difference.
I tried the Delish Classic Apple Pie recipe and loved the flaky, buttery crust and cozy cinnamon-spiced filling—easy to follow and perfect for a family dessert. I dialed back the sugar a touch next time for a bit more apple tartness, but overall it's a dependable, crowd-pleasing pie.
Shopping Tips
– Produce/Fruit: Pick firm apples with good texture—mix a tart variety (like Granny Smith) with a sweeter, crisp apple (like Fuji or Honeycrisp) for the best balance.
– Baking Basics (Flour/Sugar/Leaveners): Use all-purpose flour for the crust and both granulated and brown sugar for the filling to get caramel notes and proper sweetness.
– Fats & Oils: Real butter (or a butter-shortening mix) gives the best flavor and flakiness; keep it cold until you work it into the dough.
– Dairy: Use a high-quality butter and, if a glaze or wash calls for milk or cream, use whole milk or cream for a richer finish.
– Spices: Fresh ground cinnamon and a little nutmeg go a long way—avoid pre-mixed blends that can be overly sweet or one-note.
Prep Ahead Ideas
– Make the pie dough a day or two ahead, wrap it tightly, and keep it chilled; it actually relaxes and becomes easier to roll.
– Core and slice the apples the day before and toss them in a little lemon juice to prevent browning; store in an airtight container in the fridge.
– Combine the dry components of the filling (sugars and spices) in advance to speed assembly.
– Store prepped dough or filling in airtight containers or tightly wrapped on a plate; dough keeps a couple of days, apples about a day in the fridge.
Time-Saving Tricks
– Use a food processor to cut butter into flour quickly for the crust, or buy a high-quality rolled pie crust when time’s tight.
– Do your mise en place: measure sugars and spices into a small bowl, peel and slice apples into one container, and keep butter chilled until the last second.
– Make a single-bowl filling and toss apples directly in there to reduce dishes.
– Letting the pie rest after baking is a time saver in disguise—carryover thickens the filling so you can slice cleanly.
Common Mistakes
– Overworking the dough: I did this once and my crust came out tough; the fix is to stop kneading as soon as it holds together and chill.
– Watery filling: undercooked apples or too much added liquid cause this—choose apples with good texture and let the pie cool so the filling sets.
– Burnt edges: shield the rim with foil partway through baking if it’s browning too quickly.
– Under-seasoning: a pinch of salt or a splash of lemon lifts the whole pie—don’t skip it even in sweet baking.
– Cutting too soon: slicing hot pie turns it into soup; wait until it’s warm and set for neat slices.
What to Serve It With
– Vanilla ice cream or a scoop of crème fraîche for tang.
– A sharp cheddar slice on the side if you want a savory counterpoint.
– Warm salted caramel or a drizzle of good maple syrup for extra indulgence.
– Strong coffee or a lightly spiced tea to balance the sweetness.
Tips & Mistakes
Keep a piece of foil or a pie shield on hand to prevent over-browned edges, and don’t be afraid to use a mixture of apples for better texture. If your filling seems too thin right out of the oven, give it time—cooling is your friend. If the crust shrinks, it was likely stretched too tightly on the rim when placed in the pan; let the dough rest chilled before shaping next time.
Storage Tips
Store in airtight containers in the fridge. It reheats beautifully, but if you sneak a bite cold straight from the container, it still works.

Variations and Substitutions
– Swap some brown sugar for maple syrup for a deeper flavor, but reduce other liquid slightly to keep the filling from getting too runny.
– Add chopped toasted walnuts or pecans to the filling or sprinkle on top for crunch; note this changes texture and toasting intensifies the nut flavor.
– Use a crumble topping instead of a top crust for an easier, rustic presentation.
– For a gluten-free option, use a trusted gluten-free flour blend in the crust and pay attention to hydration—gluten-free doughs handle differently.
– While you can use ready-made crusts to save time, the classic homemade crust rewards the extra effort with better texture and flavor.
Frequently Asked Questions
Delish Classic Apple Pie Recipes
Ingredients
Main Ingredients
- 5 cups sliced apples Granny Smith or Honeycrisp recommended
- 0.5 cups sugar Adjust depending on the sweetness of apples
- 1 tablespoon cinnamon
- 0.25 cups flour For thickening the filling
- 1 package pie crust Store-bought or homemade
Instructions
Preparation Steps
- Preheat oven to 425°F (220°C).
- In a large bowl, combine sliced apples, sugar, cinnamon, and flour. Toss until apples are well coated.
- Roll out one pie crust and place it in a pie dish. Fill with the apple mixture.
- Cover with the second pie crust, seal edges, and cut slits for steam to escape.
- Bake for 15 minutes in the preheated oven. Reduce temperature to 350°F (175°C) and continue baking for 35 minutes.
- Remove from oven and let cool before serving.
Notes
Featured Comments
“Super easy and so flavorful! My family asked for seconds. Saving this one.”
“This creamy recipe was turned out amazing — the rich really stands out. Thanks!”
“Impressed! Clear steps and so flavorful results. Perfect for busy nights.”
“This creamy recipe was absolutely loved — the crowd-pleaser really stands out. Thanks!”
“Impressed! Clear steps and will make again results. Perfect for busy nights.”
“This crowd-pleaser recipe was will make again — the rich really stands out. Thanks!”
“Made this last night and it was so flavorful. Loved how the creamy came together.”
“New favorite here — family favorite. rich was spot on.”
“Super easy and will make again! My family asked for seconds. Saving this one.”
“Made this last night and it was absolutely loved. Loved how the creamy came together.”