
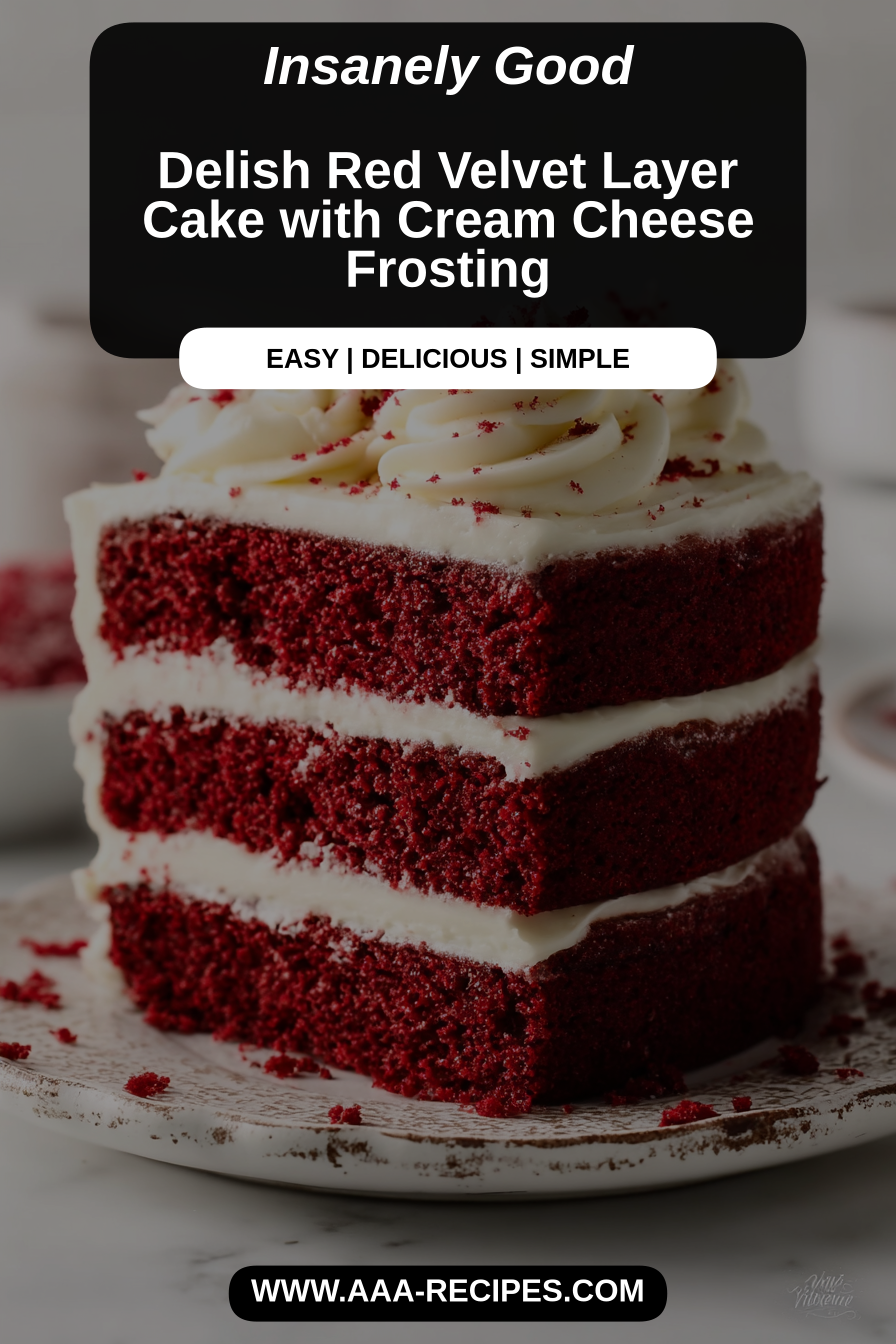
Delish Red Velvet Layer Cake with Cream Cheese Frosting
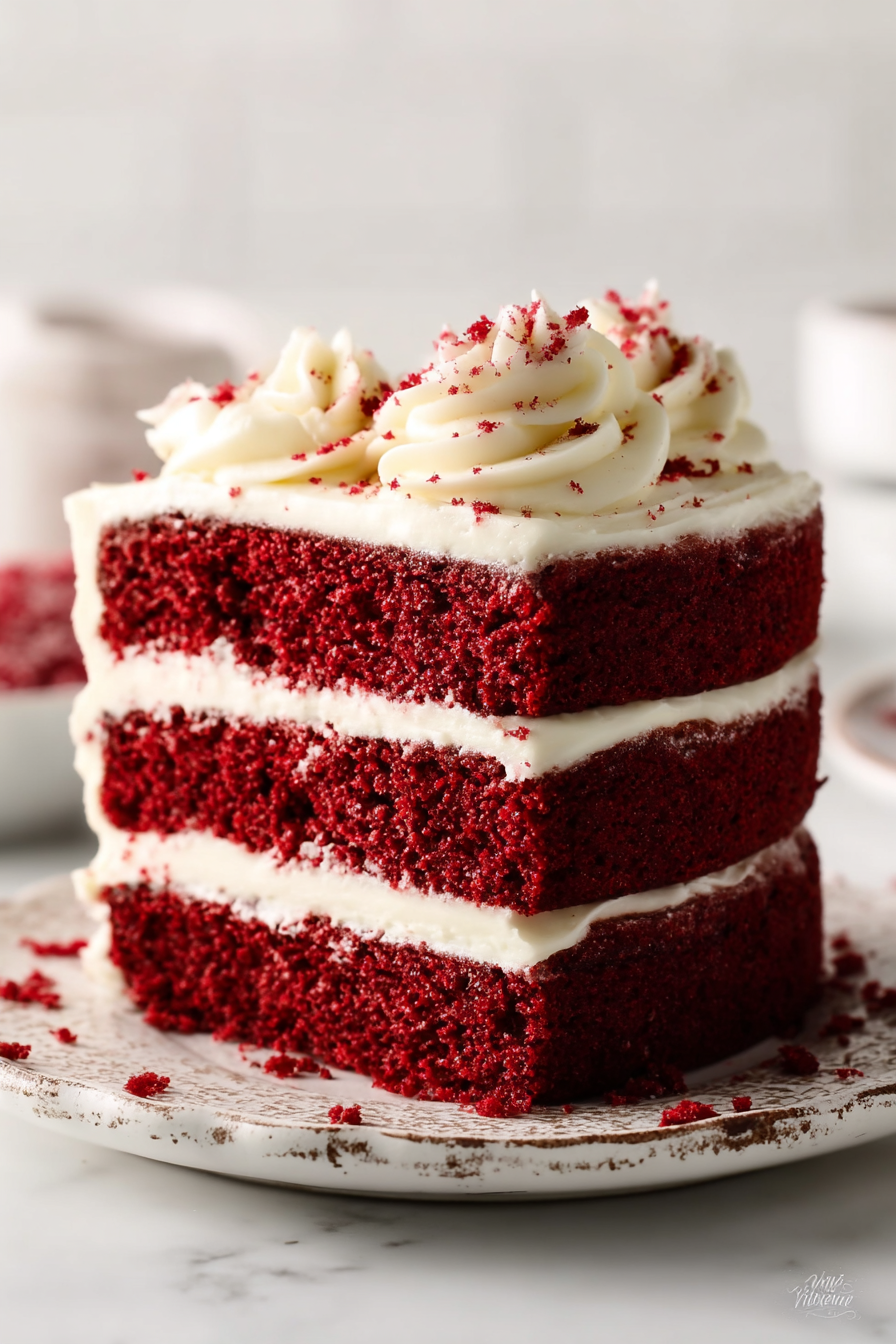
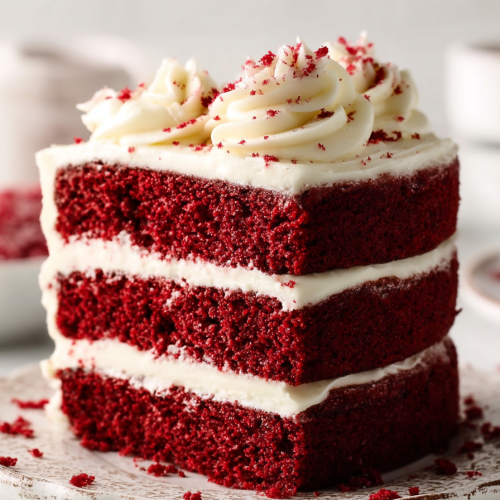
This red velvet layer cake is what I reach for when I want a dessert that feels celebratory without being fussy: tender, cocoa-scented layers tinted a cheerful red, stacked and crowned with a tangy, silky cream cheese frosting. It’s deceptively simple—classic flavors (buttermilk, a touch of cocoa, and vanilla) elevated by a plush crumb and just enough tang to cut through the sweetness—so it works for birthdays, family dinners, or whenever you want something a little special.
My husband is the unofficial official taste-tester—he’ll eat a slice for breakfast if I let him—and our kids have a ritual of stealing the frosting from the beaters before it ever reaches the cake. I made this the first time for our small anniversary when we weren’t going anywhere fancy; we lit a candle, ate it with coffee, and decided it was now officially “our” cake. It’s one of those recipes that kept showing up at holiday gatherings and then, somehow, became part of our weekly rotation whenever someone needed a cheer-up.
Why You’ll Love This Delish Red Velvet Layer Cake with Cream Cheese Frosting
– Moist, tender layers that aren’t overly sweet—just the right balance of cocoa and tang.
– A classic cream cheese frosting that’s tangy and smooth, perfect for spreading and piping.
– Easy-to-source ingredients and forgiving technique: small mistakes rarely ruin the cake.
– Beautiful to plate for guests but relaxed enough for a cozy family dessert night.
Behind the Recipe
I’ve made this cake enough times to know where bakers usually stumble: overmixing the batter (which tightens the crumb), not measuring flour properly, or skipping the cooling step before frosting. Little touches matter—a splash of vinegar or baking soda helps with lift and gives red velvet its subtle lift, and using real buttermilk (or a reliable substitute) keeps the crumb soft. When frosting, chill the layers briefly to make a clean crumb coat, and beat cream cheese gently so your frosting doesn’t become runny. These small habits turn a good cake into a reliably great one.
This Delish Red Velvet Layer Cake with Cream Cheese Frosting is a delightful treat! The layers bake up moist with that classic mild cocoa and tangy buttermilk flavor, perfectly complemented by a creamy, just-sweet-enough cream cheese frosting. It's a bit rich, but great for special occasions or when you want a classic Southern dessert that impresses.
Shopping Tips
– Baking Basics (Flour/Sugar/Leaveners): Use all-purpose flour measured by spoon-and-level or weigh it for consistency; check your baking powder/soda expiration for reliable rise.
– Chocolate: Red velvet uses a small amount of unsweetened cocoa—opt for Dutch-processed if you prefer a deeper chocolate note, or natural cocoa for brighter flavor but expect slight differences in rise.
– Dairy: Buttermilk is ideal for tang and texture; if you don’t have it, sour cream or milk + vinegar/lemon juice work in a pinch.
– Eggs: Room-temperature eggs incorporate more easily and create a smoother batter—plan to pull them out of the fridge 30 minutes before baking.
– Specialty Item: Red food coloring (liquid or gel) is optional for color intensity—gel packs more punch, so use less and avoid thinning the batter.
Prep Ahead Ideas
– Mix the dry ingredients and store them in an airtight container the day before to save time when you’re ready to make the batter.
– Bake the cake layers a day ahead, wrap them well in plastic, and keep at room temperature; assemble and frost the next day for easier decorating.
– Make the cream cheese frosting the morning of or the night before; keep chilled and re-whip briefly before spreading if it firms up.
Time-Saving Tricks
– Use a stand mixer or hand mixer for the frosting; scrape the bowl periodically to avoid lumps and speed things up.
– Line pans with parchment rounds to remove cakes quickly and reduce cooling time spent coaxing layers out of tins.
– Do your mise en place: measure dry ingredients, preheat the oven, and bring eggs and butter to room temp before you start—this alone streamlines the process.
Common Mistakes
– Overmixing the batter: I once mixed until my arm ached and ended up with a dense cake—stop when the ingredients are just combined.
– Frosting a warm cake: it melts the frosting and creates a mess—cool layers fully or chill briefly first.
– Skimping on the tang: leaving out buttermilk or acidic components flattens the flavor; the small sour note balances the sweetness.
– Using low-fat cream cheese for the frosting: it can be too watery—opt for full-fat for best texture and flavor.
What to Serve It With
Serve with a pot of strong coffee or a light sparkling wine to cut the richness. Fresh berries or a simple berry compote lift the cake with bright acidity, and a scoop of vanilla bean ice cream is an indulgent, crowd-pleasing pairing.
Tips & Mistakes
– For neat layers, use a serrated knife to level cakes after they cool and chill the leveled layers briefly before frosting.
– If your frosting seems too soft, refrigerate it for 15–20 minutes and then briefly re-whip; if it’s too stiff, whisk in a teaspoon of milk at a time.
Storage Tips
Store in airtight containers in the fridge. It reheats beautifully, but if you sneak a bite cold straight from the container, it still works.
Variations and Substitutions
– Gluten-free: Use a 1:1 gluten-free flour blend with xanthan gum and watch texture; the cake will be slightly more tender but still delicious.
– Natural color: Substitute beet powder or reduced beet juice for a natural tint, but expect a more muted color and a touch of earthiness.
– Lighter frosting: Swap half the cream cheese for mascarpone for a silkier texture, or use stabilized whipped cream for a lighter topping (it will be less tangy).
– Flavor swaps to avoid: Skipping the acid (buttermilk/vinegar) changes the chemistry and mouthfeel; that’s one classic I don’t recommend replacing entirely.
Write me the frequently asked questions and answers Delish Red Velvet Layer Cake with Cream Cheese Frosting in the same way as the example below.
Frequently Asked Questions
Delish Red Velvet Layer Cake with Cream Cheese Frosting
Ingredients
Main Ingredients
- 2 cups all-purpose flour
- 1.5 cups granulated sugar
- 1 cup buttermilk
- 0.5 cups vegetable oil
- 2 large eggs
- 2 tablespoons red food coloring
- 1 teaspoon vanilla extract
- 1 teaspoon baking soda
- 1 teaspoon white vinegar
- 0.5 teaspoon salt
- 8 oz cream cheese, softened
- 0.5 cups unsalted butter, softened
- 4 cups powdered sugar
- 2 teaspoons vanilla extract (for frosting)
Instructions
Preparation Steps
- Preheat your oven to 350°F (175°C). Grease and flour two 9-inch round cake pans.
- In a large bowl, mix the flour, sugar, baking soda, and salt.
- In another bowl, mix the buttermilk, eggs, oil, food coloring, and vanilla extract.
- Combine the wet and dry ingredients, and mix well. Add the vinegar and stir until just combined.
- Divide the batter between the prepared cake pans and bake for 25 minutes.
- Let the cakes cool in the pans for 10 minutes, then transfer to wire racks to cool completely.
- For the frosting, beat the cream cheese and butter until smooth, then gradually add the powdered sugar and vanilla. Mix until fluffy.
- Frost the top of one cake layer, place the other on top, and frost the top and sides of the cake.
- Slice and serve your delicious red velvet cake!
Notes
Featured Comments
“Impressed! Clear steps and will make again results. Perfect for busy nights.”
“This rich recipe was family favorite — the crowd-pleaser really stands out. Thanks!”
“New favorite here — family favorite. rich was spot on.”
“Impressed! Clear steps and turned out amazing results. Perfect for busy nights.”
“Super easy and absolutely loved! My family asked for seconds. Saving this one.”
“New favorite here — turned out amazing. rich was spot on.”
“Impressed! Clear steps and family favorite results. Perfect for busy nights.”
“New favorite here — turned out amazing. sweet treat was spot on.”
“Super easy and absolutely loved! My family asked for seconds. Saving this one.”
“New favorite here — family favorite. rich was spot on.”