
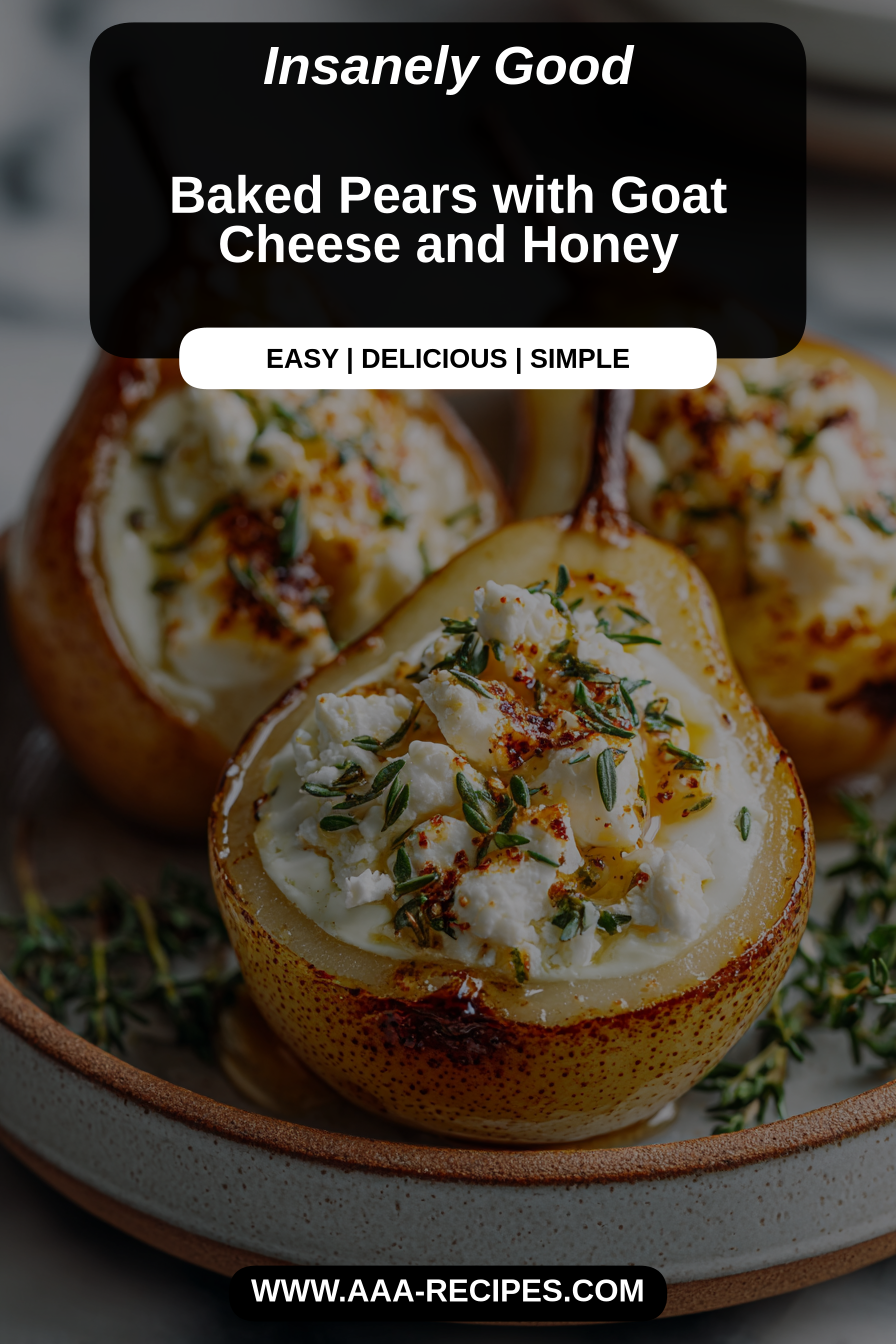
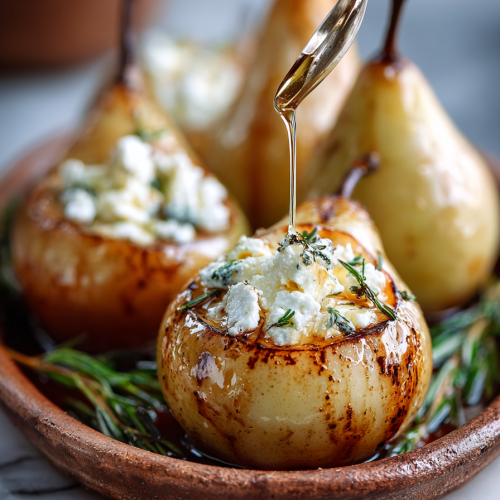
Baked Pears with Goat Cheese and Honey
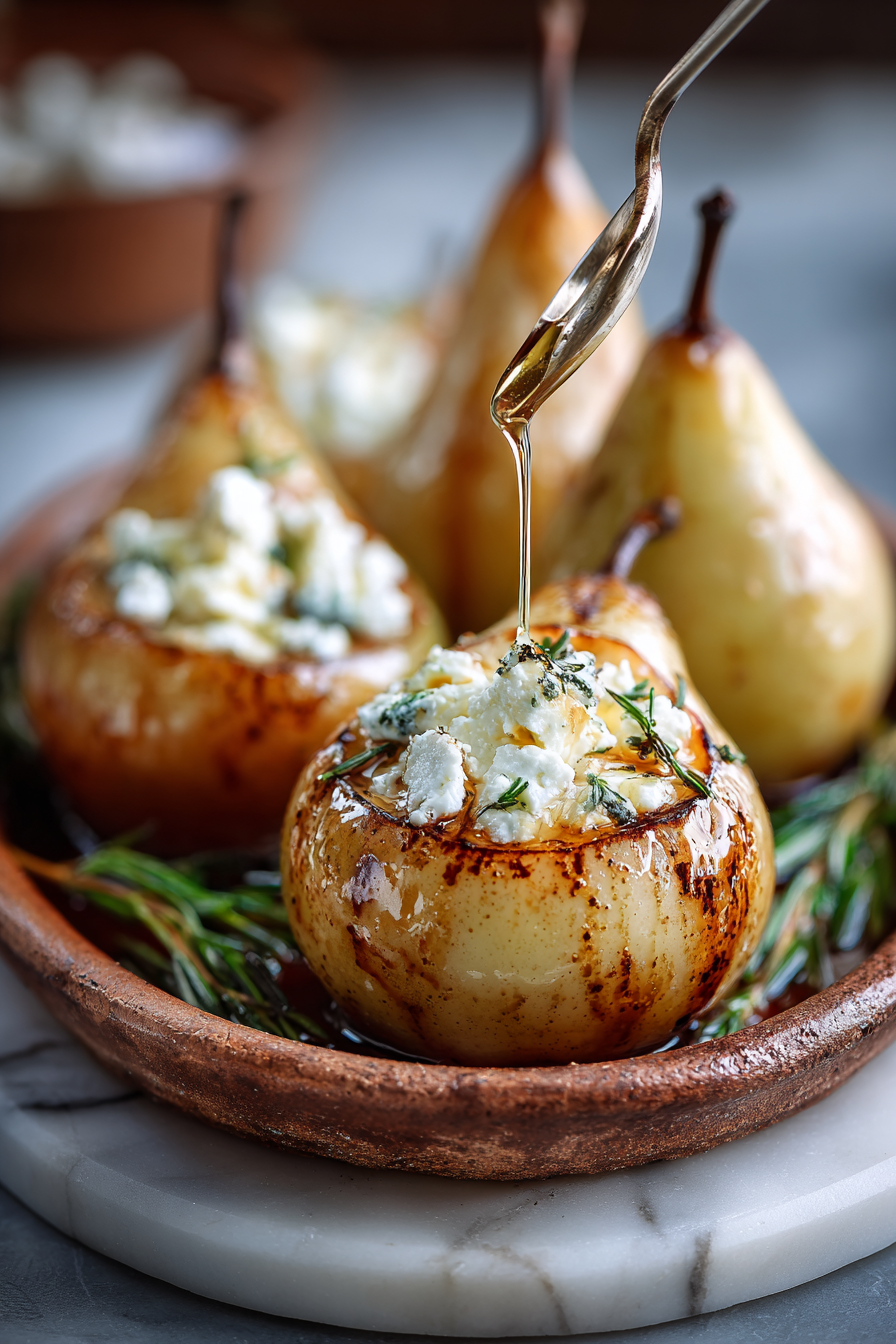
Some mornings feel like a soft exhale, and this is one of those recipes I turn to when I want a quiet, gentle moment that still tastes like a small celebration. Baked Pears with Goat Cheese and Honey is exactly that: warm, caramelized fruit, the tang of goat cheese that melts into sweet pockets, and a drizzle of honey that makes the whole kitchen smell like late autumn. It’s simple enough for a weekday, special enough for a slow weekend brunch, and it carries a little elegance without any fuss. If you’re someone who loves food that comforts without being heavy, this will be a lovely thing to make and share.
There’s a small, ordinary memory tied to this dish that I come back to. One Saturday, the light through our kitchen window was all buttery and low, and my husband shuffled in with one sock halfway on and the newspaper still folded under his arm. Our little one was zooming around in a cardboard spaceship, leaving a trail of wooden blocks. I popped pears in the oven, spread on soft goat cheese, and whisked honey with a tiny splash of lemon because—honestly—I like that bright note. The dog, of course, took up his post by the oven like it was his appointed throne. When the pears came out, our kiddo declared it “fancy fruit,” which is still the best compliment. We ate with mismatched plates, laughed about the sock, and the kitchen felt like the safest, easiest place in the world. That’s what this dish brings: a little ceremony, a little laughter, and a comfort that’s warm enough to wrap around you.
Why You’ll Love This Baked Pears with Goat Cheese and Honey
– It’s quietly luxurious: the pears turn tender and slightly caramelized at the edges, the goat cheese gives a creamy tang, and the honey adds a glossy sweetness that glints in the afternoon light.
– It’s forgiving and human-friendly: you don’t need perfect pears or a perfect morning to make it delightful. Slightly firmer fruit holds up beautifully; riper ones melt into velvet.
– Sensory charm: the aroma of warm fruit and honey is the kind that makes people slow down. You’ll notice the soft crackle as the pears settle, the way the goat cheese puckers and creases like a tiny pastry.
– Versatile comfort: serve it simple for a weekday pick-me-up, add a few nuts and greens for weekend brunch, or pair it with a glass of something chilled for a calm, grown-up dessert.
Slow Moments
There’s a rhythm to making these pears that I adore. I like to let the house wake up first: coffee halfway drank, newspaper at my feet, low music on—something folky or a playlist of old favorites. I’ll stand at the counter for a moment, feeling the pear’s smooth skin under my fingers, deciding which ones look like they’ll hold their shape. I’ll spread goat cheese with a butter knife, more by eye than measure, thinking about the little things I want to be generous with that day. While they bake, I’ll clean up the few crumbs and steal tiny tastes of honey from the jar—don’t tell anyone, but I always test it. My kid will dart in and out, asking important questions like whether pears count as vegetables (they don’t, in case you were wondering), and our dog will offer silent moral support. When the pears come out, steam ribboning up like a warm blanket, that first bite is the reward: the cool whisper of cheese, the warm, slightly sticky pear, and the gleam of honey balancing the whole thing. It’s small, but it’s enough to make the rest of the day feel slow and kind.
This was such a lovely and surprisingly easy dessert! The pears got wonderfully soft, and the tangy goat cheese with the sweet honey was a perfect combo. A little fancy for a weeknight, but definitely a winner for guests or when you want a treat.
Time-Saving Hacks
– Use riper pears if you want shorter baking time—just watch them so they don’t collapse. Ripe fruit softens faster and gives you the same honeyed warmth with less waiting.
– Pre-slice the goat cheese into rounds and keep them wrapped in the fridge for a fast assembly when mornings are rushed. It saves that half-panicked hunt for a clean spoon.
– Keep a jar of good honey and a small lemon near the stove. A squeeze of citrus lifts the honey and makes the flavors feel balanced without extra effort.
– If you’re short on time, pop the pears under a broiler for a minute or two instead of a longer bake—just enough to warm and soften them. It’s not quite the same as slow roasting, but it’s cozy in a pinch.
– Gentle reminder: sometimes slowing down—little pauses between steps—actually improves the result. Let the pears cool a touch so the cheese doesn’t run away; it’s worth the extra minute.
Serving Ideas
– For a simple weeknight, serve each pear half with a scattering of toasted walnuts or pecans and a handful of peppery arugula. The greens add a tiny, fresh contrast that makes the plate feel balanced.
– For a slower weekend, place pears on toasted slices of rustic bread or crostini, drizzle with honey, and finish with a shave of lemon zest and a sprinkle of flaky salt. Add a small bowl of olives and a carafe of lightly steeped tea for a gentle spread.
– Pairing drinks: a cup of bright coffee is lovely in the morning; in the evening, a light white wine or a sparkling cider sings with the fruit and cheese.
– Complementary recipe: if you like the idea of a nuanced, savory-sweet table, try pairing with Baked Pears with Goat Cheese and Honey for a little contrast—those flavors love company.
Tips & Mistakes
I’ll admit I’ve had my share of pear misadventures. One winter, I used very ripe fruit and forgot to watch the oven; they turned to a sweet, shapeless puddle. Lesson learned: aim for pears that are ripe but still have a gentle firmness unless you like jammy results. Another time I went heavy on the goat cheese and ended up with more goat-cheese-than-pear bites—delicious, but not the balance I was after. A good rule is to think in small pockets of cheese rather than a blanket. And don’t be shy with texture: a sprinkle of toasted nuts or seeds makes everything more interesting. If your honey is very runny, a short chill in the fridge helps it thicken slightly so it sits prettily on the pear rather than running off the plate.
Storage Tips
Leftovers are gentle company. I like to keep leftover pears in an airtight container in the fridge for up to two days. They’re delightful warm—just a quick reheat in a low oven or a brief pop in the microwave—and still lovely cold, especially beside a half-drunk cup of coffee for a next-day nibble. If you plan to store them, keep the nuts or any crunchy toppings separate until you’re ready to serve so they stay crisp. For lunches, tuck a pear half into a small container with some arugula and a few crackers—it’s a sweet, savory pause in the middle of a busy day.
Variations and Substitutions
I’ve swapped things around a lot and found some lovely alternatives. Try goat cheese’s cousins—ricotta for a milder, creamier feel, or a soft blue cheese if you’re in the mood for a bolder note. Maple syrup is a cozy substitute for honey, especially in colder months when I want a deeper, woodsy sweetness. You can add a whisper of citrus zest for brightness or a sprinkle of chopped thyme for a savory lift—both have been winners at my table. If pears aren’t in season, apples work too, though they’ll be firmer and need a touch more time; I like to slice them thinly so they soften more quickly. Each swap changes the mood slightly, which is part of the joy: small experiments that keep this simple ritual feeling new.
Frequently Asked Questions
Baked Pears with Goat Cheese and Honey
Ingredients
Main Ingredients
- 4 medium pears Pears Choose ripe but firm pears.
- 6 oz Goat cheese Soft cheese works best.
- 2 tbsp Honey Use local honey for best flavor.
- 1 tbsp Walnuts Chopped, optional for crunch.
- 1 tsp Cinnamon Sprinkle for added warmth.
Instructions
Preparation Steps
- Preheat your oven to 375°F.
- Halve the pears and scoop out the seeds.
- Arrange the halved pears in a baking dish, cut side up.
- Stuff each pear half with goat cheese.
- Drizzle honey over the stuffed pears.
- Sprinkle chopped walnuts and cinnamon on top.
- Bake in the oven for about 25 minutes or until pears are tender.
- Serve warm and enjoy your delightful dessert!
Notes
Featured Comments
“Impressed! Clear steps and family favorite results. Perfect for busy nights.”
“Made this last night and it was will make again. Loved how the crowd-pleaser came together.”
“Super easy and turned out amazing! My family asked for seconds. Saving this one.”
“Super easy and absolutely loved! My family asked for seconds. Saving this one.”
“Impressed! Clear steps and turned out amazing results. Perfect for busy nights.”
“Made this last night and it was turned out amazing. Loved how the creamy came together.”
“This rich recipe was family favorite — the crowd-pleaser really stands out. Thanks!”
“New favorite here — turned out amazing. creamy was spot on.”
“New favorite here — absolutely loved. sweet treat was spot on.”
“New favorite here — absolutely loved. crowd-pleaser was spot on.”