
Delish Red Velvet Chocolate Chip Cookies
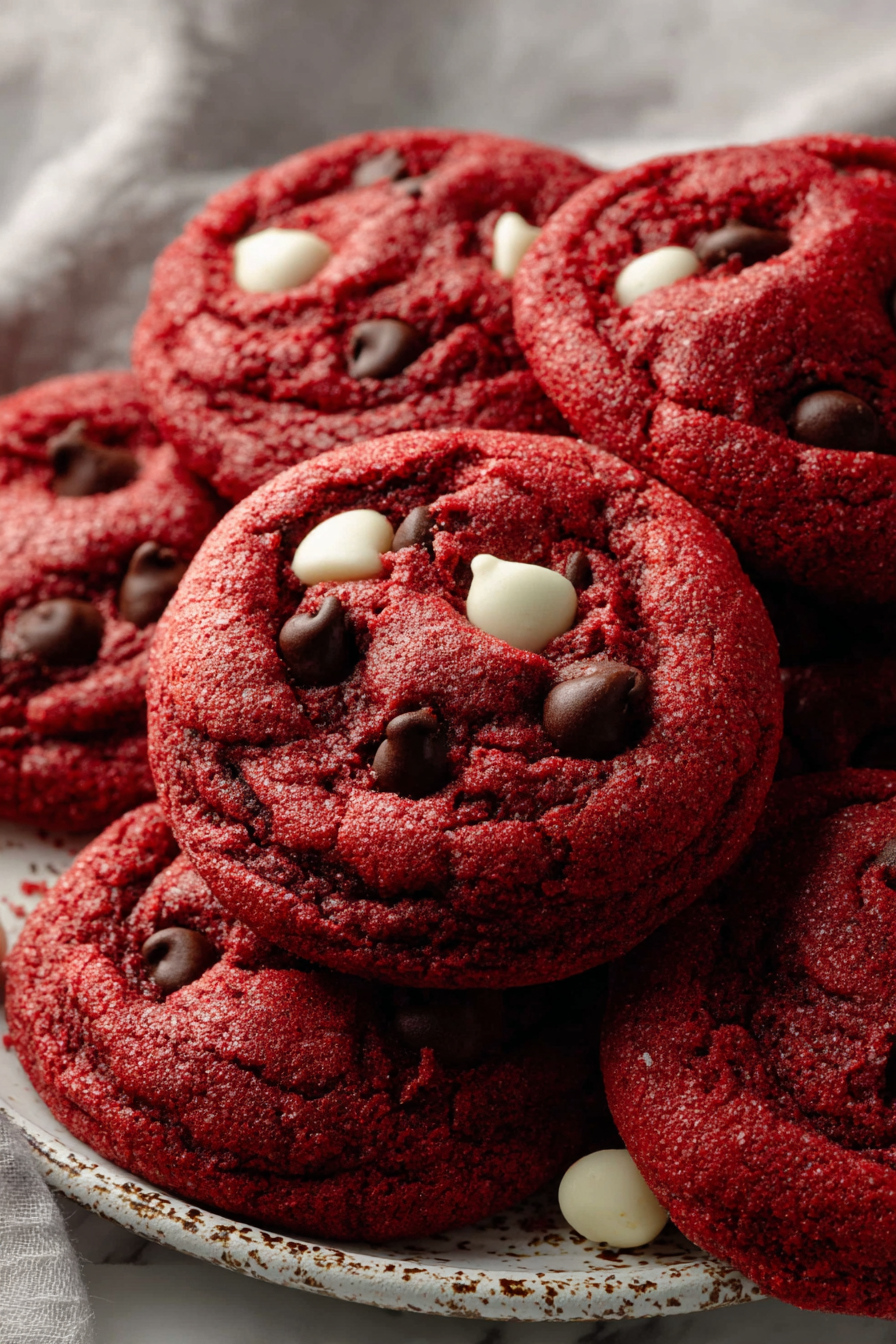
These cookies are a playful twist on classic red velvet—tender, slightly cakey edges with a soft, cocoa-kissed center studded with melty chocolate chips. The red color makes them feel festive without being fussy, and a touch of tang (buttermilk or vinegar) keeps the flavor balanced so they never taste like pure food coloring. If you want a cookie that feels special but is wildly easy to make, this one hits the sweet spot.
My husband begged me to keep these in rotation after the first batch. He calls them “fancy chocolate chip cookies” and insists they’re the best thing to bring to book club or Sunday soccer pickups—because they look like you tried hard, but they’re actually forgiving to make. Our toddler’s favorite part is the red crumbs; we find them scattered like confetti for days. These have become my go-to when I want something that travels well, pleases a crowd, and still tastes homemade.
Why You’ll Love This Delish Red Velvet Chocolate Chip Cookies
– They look festive and gift-ready without complicated decorating—perfect for holiday cookie swaps or a quick bake-and-go dessert.
– The balance of mild cocoa, a hint of tang, and chocolate chips gives you depth without overwhelming sweetness.
– The dough is forgiving: chilling improves texture, but the cookies turn out well even if you skip a long rest.
– Easy to scale up for parties; they hold shape in transit and freeze beautifully if you want to make batches ahead.
Behind the Recipe
This recipe grew out of wanting a cookie that had the nostalgic red velvet vibe but the comforting familiarity of chocolate chips. Over a few tries I learned not to overmix once the flour goes in—overworked dough yields denser, tougher cookies rather than the tender, slightly cakey texture I prefer. Another lesson: less food coloring goes a long way; a little gives you that signature hue without a chemical taste. Small additions—like a splash of vanilla and a whisper of vinegar or buttermilk—make the cocoa pop and keep the flavor from feeling one-note. And when in doubt, give the dough a short chill: it improves flavor and prevents excessive spreading.
These Delish Red Velvet Chocolate Chip Cookies are a lovely twist on classic chocolate chip cookies with that subtle cocoa and red velvet flavor. They bake up soft and chewy with just the right amount of chocolate chips, making them a great treat for any occasion. I found them easy to make and delicious, though I wish they were a bit more moist inside.
Shopping Tips
– Baking Basics (Flour/Sugar/Leaveners): Use plain all-purpose flour and measure by spooning into the cup or weighing for accuracy; check that your baking powder and baking soda are fresh for best rise.
– Fats & Oils: Unsalted butter gives the cleanest flavor—if you only have salted, reduce added salt in the recipe and taste the dough.
– Chocolate: Pick semi-sweet chocolate chips for balanced sweetness; chopped dark chocolate makes the texture more interesting and melts into pockets.
– Eggs: Use large eggs at room temperature so they emulsify into the batter more smoothly and help with structure.
– Dairy: Buttermilk adds tang and tenderness; if you don’t have it, sour milk (milk + a splash of vinegar) will do the trick.
Prep Ahead Ideas
– Mix the dough up to 48 hours ahead and keep it chilled; flavor develops and the dough firms up, making neat scoops and thicker cookies.
– Portion dough into scoops on a baking sheet and freeze them on a tray, then bag the frozen scoops for grab-and-bake convenience.
– Measure dry ingredients into a container the day before and store tightly; this saves time and keeps the baking process streamlined.
Time-Saving Tricks
– Use a stand or hand mixer to cream butter and sugars quickly and evenly, but switch to folding by hand once the flour is added to avoid overmixing.
– Freeze pre-scooped dough so you can bake a few warm cookies on demand—no thawing needed if you add a couple of extra minutes to bake time.
– Line baking sheets with silicone mats or parchment so you can reuse sheets without scrubbing and get even browning.
Common Mistakes
– Overbaking: I once left a batch in the oven and ended up with dry cookies; pull them when edges are set and centers still look slightly underdone—they finish while cooling.
– Too much food coloring: adding a whole bottle can give a bitter or metallic taste; use a teaspoon at a time to reach your preferred shade.
– Overmixing after adding flour: this tightens gluten and makes cookies chewy rather than tender—mix until just combined.
– Skipping chill time entirely: dough that’s too warm spreads too much. If you’re short on time, chill scooped dough for 15–20 minutes before baking.
What to Serve It With
Serve warm with a tall glass of milk, espresso, or a scoop of vanilla ice cream for an extra-decadent treat. For gatherings, a simple cream cheese drizzle or frosting on a few cookies elevates the presentation without overwhelming the cookie’s texture.
Tips & Mistakes
– If your cookies spread too thin, your butter was likely too warm—try chilling the dough or using slightly less butter.
– For taller cookies, scoop and chill the dough balls before baking; this helps them hold shape and stay soft inside.
– If the centers seem underbaked but the edges are dark, lower the oven temperature by 10–15°F and bake a touch longer for even cooking.
Storage Tips
Store in airtight containers in the fridge. It reheats beautifully, but if you sneak a bite cold straight from the container, it still works.

Variations and Substitutions
– Swap semi-sweet chips for white chocolate chips or chopped dark chocolate for a different flavor profile; white chocolate pairs nicely with the red hue.
– For a fuss-free tang, use cultured buttermilk; for a vegan version, try a neutral plant-based butter and flax “egg,” though texture will be slightly different.
– If you prefer less color, tone down the food coloring and lean into cocoa and vanilla for flavor-forward cookies.
– Avoid substituting all-purpose flour with very low-protein flours (like cake flour) in large amounts unless you’ve adjusted liquids—structure will change.
Frequently Asked Questions
Delish Red Velvet Chocolate Chip Cookies
Ingredients
Main Ingredients
- 2.5 cups all-purpose flour
- 1 cup unsweetened cocoa powder
- 1 cup butter softened
- 1.5 cups brown sugar
- 1 cup granulated sugar
- 2 large eggs
- 1 teaspoon vanilla extract
- 0.5 teaspoon red food coloring
- 2 cups chocolate chips
Instructions
Preparation Steps
- Preheat your oven to 350°F (175°C).
- In a bowl, cream together the softened butter, brown sugar, and granulated sugar until smooth.
- Add the eggs one at a time, mixing well after each addition, then stir in the vanilla and food coloring.
- In another bowl, whisk together the flour, cocoa powder, and any remaining dry ingredients.
- Gradually add the dry ingredients to the wet mixture, mixing until just combined.
- Fold in the chocolate chips.
- Drop by rounded tablespoon onto a baking sheet lined with parchment paper.
- Bake for 10-12 minutes, or until edges are set.
- Allow to cool on the baking sheet for a few minutes before transferring to wire racks.
Notes
Featured Comments
“Super easy and so flavorful! My family asked for seconds. Saving this one.”
“Made this last night and it was will make again. Loved how the crowd-pleaser came together.”
“Impressed! Clear steps and so flavorful results. Perfect for busy nights.”
“This rich recipe was so flavorful — the crowd-pleaser really stands out. Thanks!”
“Made this last night and it was absolutely loved. Loved how the sweet treat came together.”
“This crowd-pleaser recipe was turned out amazing — the creamy really stands out. Thanks!”
“Super easy and family favorite! My family asked for seconds. Saving this one.”
“New favorite here — so flavorful. crowd-pleaser was spot on.”
“Super easy and absolutely loved! My family asked for seconds. Saving this one.”
“New favorite here — absolutely loved. rich was spot on.”