
Easy White Bread Recipe for Beginners
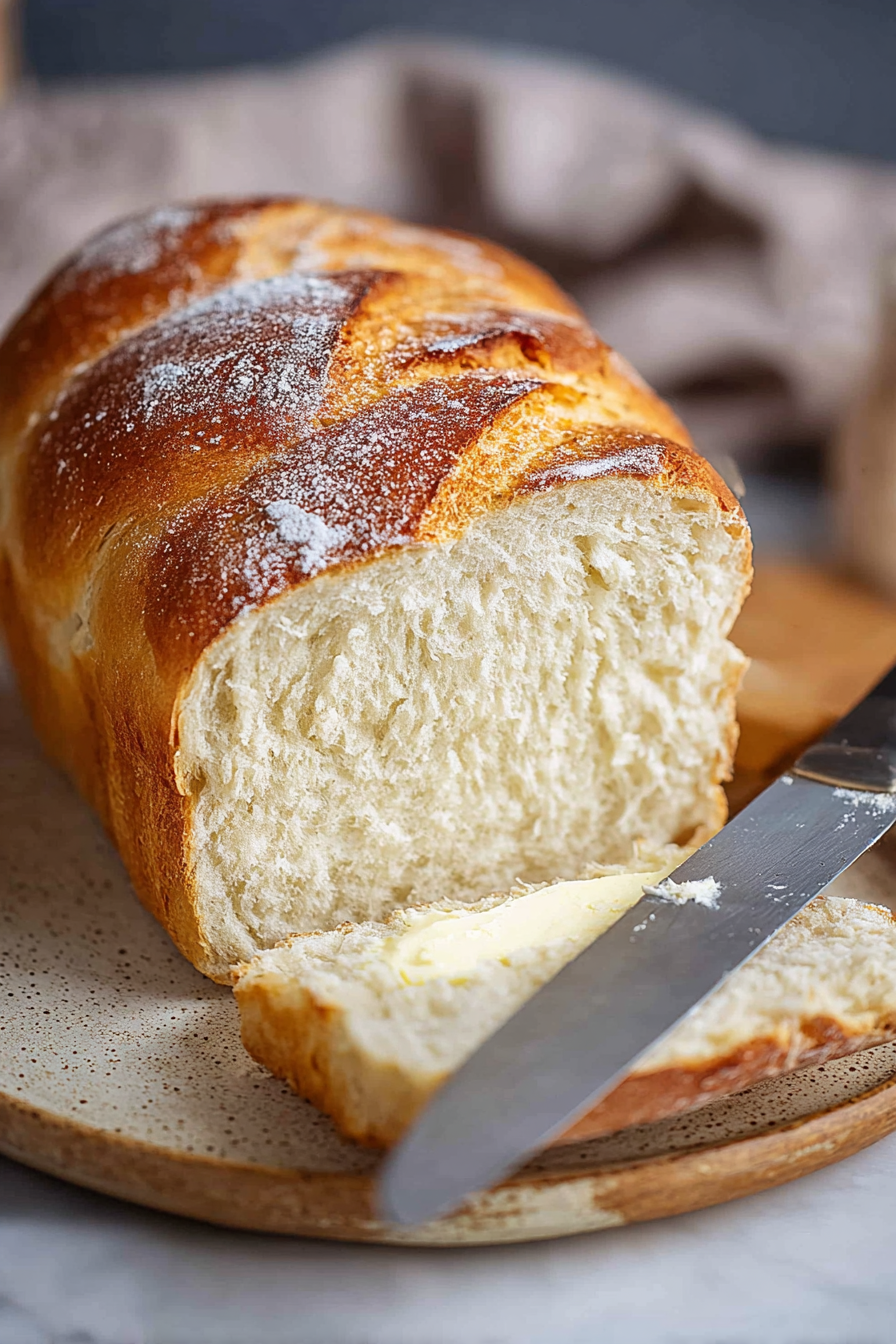
This white bread is the kind of loaf that makes the house smell like comfort: simple ingredients, a pillowy crumb, and a thin, golden crust that toasts up perfectly for morning butter and jam. It’s forgiving for beginners but satisfying enough that you’ll make it again and again — no fancy gear required, just a little patience and a reliable recipe.
My husband calls this “the everyday miracle loaf.” When we first started making it, he’d come home from work and insist I slice it warm, slather on butter, and eat it with him on the couch while it was still steaming. Our kiddo calls it sandwich bread and requests it for school lunches, and on Sundays we make an extra loaf to disappear with tomato soup. It’s become the little routine that makes ordinary evenings feel special.
Why You’ll Love This Easy White Bread Recipe for Beginners
– It uses pantry staples and a straightforward method so even first-time bakers feel confident.
– The texture is soft and tender without being gummy — great for sandwiches, toast, and French toast.
– It’s forgiving: small variations in kneading time or temperature won’t ruin the loaf, which is ideal when you’re learning.
– Makes one nicely sized loaf that feeds a small family or yields several days’ worth of breakfast toast.
Behind the Recipe
I developed this version after years of tweaking—sometimes too wet, sometimes too dense—and finally landed on a balance that works in most home kitchens. The trick is a predictable hydration level and a modest amount of sugar to give the yeast a friendly start without making the bread sweet. Temperature matters: slightly warm (not hot) liquid wakes the yeast without killing it, and letting the dough rise until roughly doubled rather than timing it by the clock helps accommodate different kitchen temperatures. Kneading enough to develop a smooth, slightly springy dough will give you a consistent crumb, but don’t panic if it’s not glassy — the dough will continue to relax and improve during the first rise.
This Easy White Bread Recipe for Beginners is genuinely approachable and yields soft, fluffy loaves that remind me of bakery bread. The steps are straightforward, making it perfect for first-timers, though I found the kneading a bit time-consuming by hand. Overall, it’s a satisfying way to enjoy homemade bread without too much fuss.
Shopping Tips
– Baking Basics (Flour/Sugar/Leaveners): Use a good-quality all-purpose or bread flour for best structure; bread flour gives a chewier crumb while all-purpose is more tender and still reliable.
– Dairy: If the recipe calls for milk, choose whole or 2% for richer flavor, but water works fine if you prefer a lighter loaf or are avoiding dairy.
– Fats & Oils: Unsalted butter gives the nicest flavor; if using oil, neutral-flavored vegetable or canola oil is a safe swap.
– Eggs: Some white bread recipes include an egg for richness; if yours does, pick large eggs at room temperature so they incorporate easily.
– Specialty Item: Pick good yeast—either active dry or instant works; instant (rapid-rise) is convenient, but if using active dry, proof it in warm liquid first.
Prep Ahead Ideas
– Mix and knead the dough the night before, then refrigerate for a slow overnight rise; shape and bake the next morning for fresher bread with less hands-on time.
– Measure dry ingredients into a labeled container or zip-top bag and keep wet ingredients together in the fridge so you can assemble quickly.
– Store pre-shaped dough covered in the fridge for up to 24 hours; bring it back to room temperature before the final rise for an even bake.
Time-Saving Tricks
– Use a stand mixer with a dough hook to cut kneading time, especially if you bake often; 6–8 minutes on low-medium usually does the job.
– Warm your liquid in the microwave for 10–15 seconds to shave time — it only needs to be comfortably warm, not hot.
– Make two smaller loaves in loaf pans to shorten baking time slightly and get more evenly baked centers.
– Letting the dough rest (autolyse) for 10–20 minutes after mixing flour and water can reduce kneading and improve extensibility.
Common Mistakes
– Overproofing: I once left dough rising on a hot afternoon and it collapsed when baked; if it looks overly puffy and then deflates, reshape and give it a short second rise before baking.
– Too much flour: Adding flour by the cup can lead to a dry loaf — aim for a slightly tacky dough that holds its shape.
– Liquid temperature mistakes: If your liquid is too hot, yeast dies; if too cold, it won’t activate. Aim for about 100–110°F (warm to the touch).
– Under-kneading: A dense center often means not enough gluten development; knead until the dough is smooth and springs back when poked.
What to Serve It With
Tips & Mistakes
Serve this bread simply: toasted with butter and jam, as the base for a hearty grilled cheese, or sliced thin for sandwiches. For soups, thick slices cut into cubes make excellent croutons — toast them first for extra crunch. One common misstep is slicing the loaf too soon; wait until it cools slightly so the crumb sets and slices cleanly.
Storage Tips
Store in airtight containers in the fridge. It reheats beautifully, but if you sneak a bite cold straight from the container, it still works.

Variations and Substitutions
You can swap part of the white flour for whole wheat (start with 25–30% whole wheat) but expect a denser loaf and slightly longer rise times. Honey or maple syrup can replace part of the sugar for a gentler sweetness, and olive oil is an acceptable, flavorful substitute for butter if you want a dairy-free option. If you try adding seeds or oats, fold them into the dough after the first rise to keep the crumb tender.
Frequently Asked Questions
Easy White Bread Recipe for Beginners
Ingredients
Main Ingredients
- 4 cups all-purpose flour
- 1 packet instant yeast
- 1 tablespoon sugar
- 1 tablespoon salt
- 1.5 cups warm water must be around 110°F
- 2 tablespoons olive oil
Instructions
Preparation Steps
- In a large bowl, mix warm water, sugar, and yeast. Let it sit for 5 minutes until frothy.
- Add olive oil, salt, and flour to the yeast mixture. Mix until it forms a dough.
- Knead the dough on a floured surface for about 10 minutes until smooth and elastic.
- Place the dough in a greased bowl, cover with a cloth, and let it rise for 1 hour or until doubled in size.
- Punch down the dough and shape it into a loaf. Place it in a greased loaf pan.
- Let it rise for another 30 minutes. Preheat the oven to 375°F.
- Bake for 30 minutes until golden brown. Cool before slicing.
Notes
Featured Comments
“Impressed! Clear steps and turned out amazing results. Perfect for busy nights.”
“Made this last night and it was absolutely loved. Loved how the healthy swap came together.”
“Made this last night and it was so flavorful. Loved how the party favorite came together.”
“Impressed! Clear steps and family favorite results. Perfect for busy nights.”
“Impressed! Clear steps and family favorite results. Perfect for busy nights.”
“Impressed! Clear steps and family favorite results. Perfect for busy nights.”
“This toasty recipe was will make again — the fresh catch really stands out. Thanks!”
“New favorite here — will make again. satisfying was spot on.”
“New favorite here — will make again. weeknight saver was spot on.”
“This crunchy recipe was family favorite — the warm really stands out. Thanks!”